We are working furiously on projects right now. That’s because in less than two weeks, we will open up our home for the 2019 Historic Cranbury House Tour. One of the projects that needed a little boost was repairing the leaded glass windows.
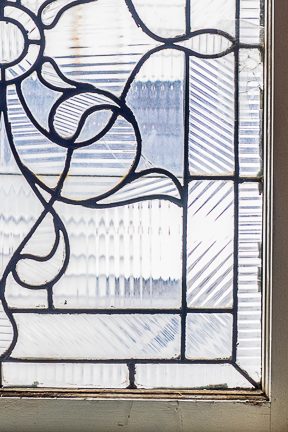
There are two of these windows along the front staircase wall. They were once nice windows but had sagged over time as the lead between the glass oxidized and lost structure. Some of the glass pieces were broken. Our first winter in the house, the cold wind flowed in through holes in these windows. On one of the windows, I used clear tape to close a hole! In the worst of the weather, we added insulating plastic. If you look closely in the photo to the right, you can see the “repaired hole,” other broken pieces, deteriorating wood, and the sagging lead.
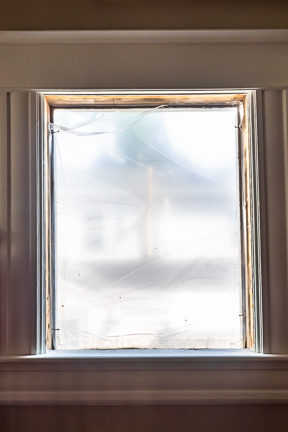
Last fall, David decided that he was going to repair the smaller of the two windows. He took it down and replaced it with plexiglass. This was much better than the black plastic trash bag he used for the larger window this summer. This is our renovation life–living through a mess in hope for a better future.

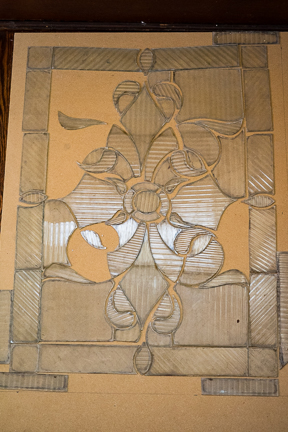
Unfortunately, several pieces of glass were cracked and more broke in the process of removing glass from the old lead. Here is what remained of the smaller window. I had to piece it together like a puzzle. This window languished in the basement all winter because the thought of completing it was so daunting.
This is not a project that should be done by an amateur. In fact, David has had a lot of experience over the years of making stained glass windows. But he prefers to work in copper foil–the style of Tiffany–over working in lead. The small, intricate pieces made these windows a challenge to repair using lead. We resisted the temptation of starting over with a new design and new glass.
In July, with the house tour looming, this was a project that needed to be finished. We removed the second, larger, window and got to work. The first step was to remove the old lead and then clean the cement and dirt off of the individual glass pieces. Then we laid the glass pieces together to see what was missing. The large window had far fewer missing pieces.
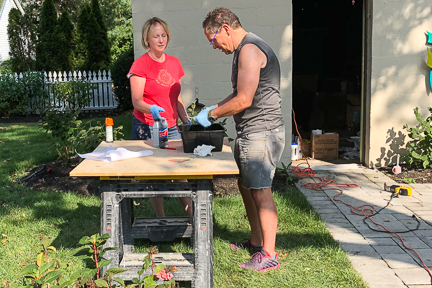
Because the original glass was clear and had a simple texture, we were able to find new glass that was quite similar. David cut the new glass to replace the old, broken pieces. Next, he cut the lead, wrapped the glass pieces, and assembled the window. Then he soldered the lead joints together. We want these windows to last a long time, so David added cement in the cracks between the lead and glass for strength. Finally, he used chalk to remove the excess cement and cleaned the glass. After placing the window in the repaired frame, he added a layer of clear glass for protection and insulation. No more tape!

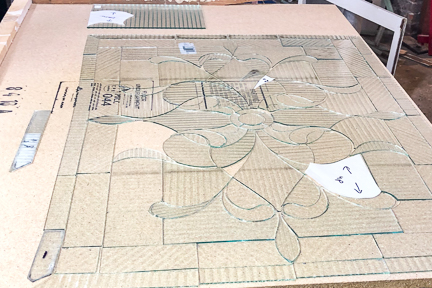
Assembling the window 
After soldering joints together 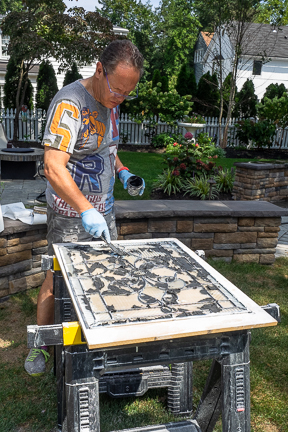
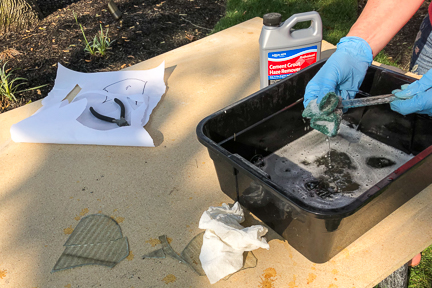
Cementing for strength 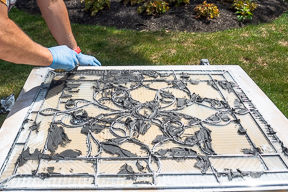
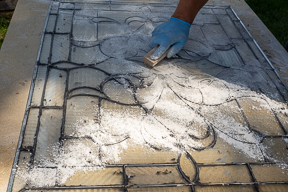
Removing excess cement
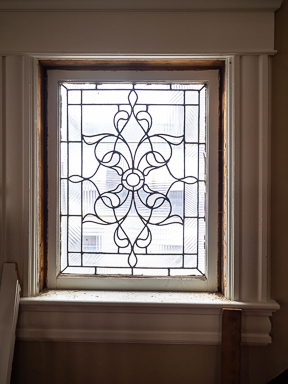
The finished windows are beautiful! Even in person, you have to look closely to know which of the glass pieces are new. I am thrilled to have light back through the sparkling windows.
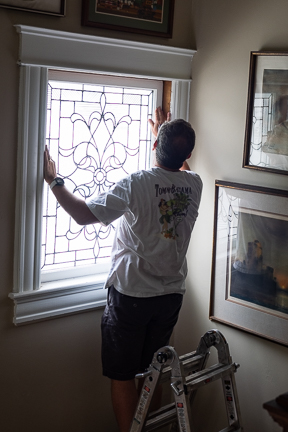
Putting the window in place 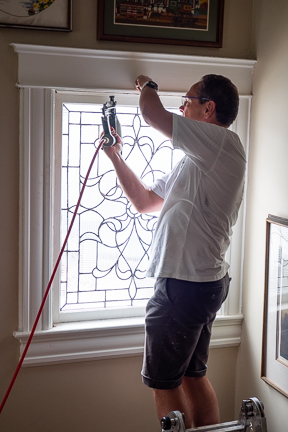
Nailing in the frame 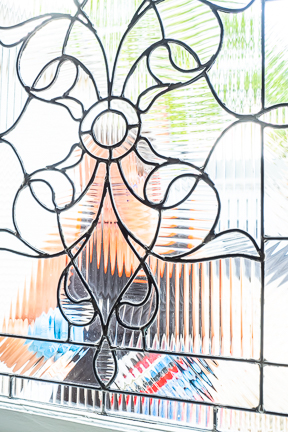
Cleaning and painting 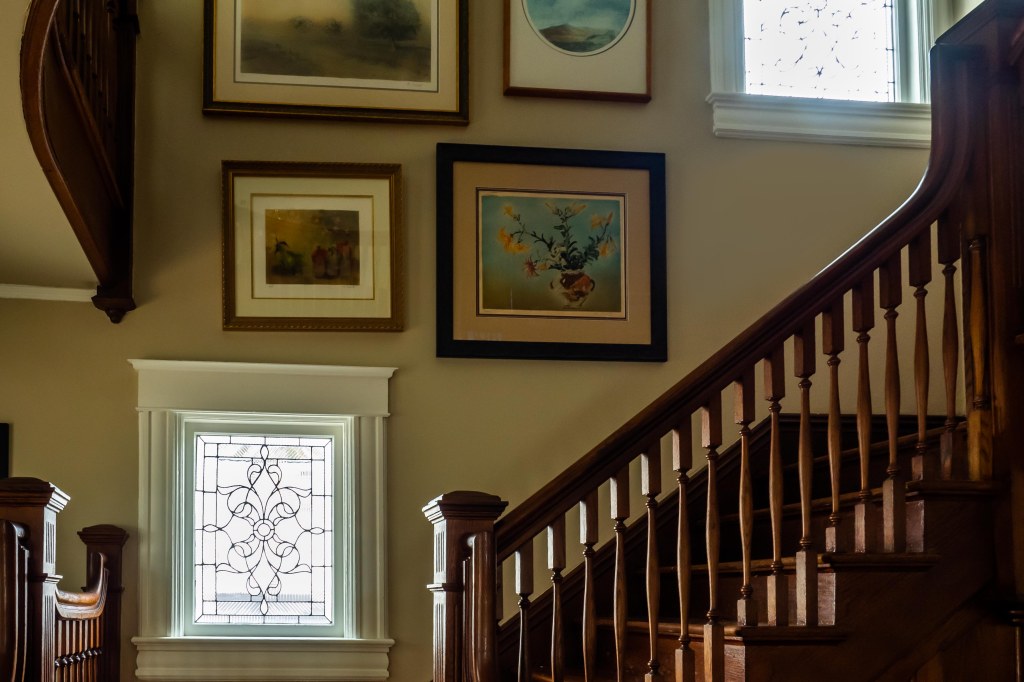

Again you two are amazing! The windows are so elegant and gorgeous—-thanks for saving them!!
LikeLiked by 1 person
What an incredibly marvelous job! I am anxious to see it in person.
Sent from Mail for Windows 10
LikeLiked by 1 person
True artists at work! The town is obviously honored by your taking on this remodeling as a tribute not only to the past–but to the future.
LikeLiked by 1 person